RESPONSUM allows a specific customer environment to be linked to one or more Okta directories of the customer.
Small upfront configuration by the IT team managing Okta is required to setup the SSO link between Okta and RESPONSUM.
Step 1: Request that you want to activate an Okta SSO integration
Send us an email via support@responsum.eu with a brief description that you want to activate Okta for your RESPONSUM environment. As a reply back from us, you will get a Redirect URL that you will need to conduct the next steps.
The URL you will receive will look something like: https://id.responsum.app/realms/<companyname>/broker/oidc/endpoint
Step 1: Create an Okta application for the SSO sync
- Navigate to your Okta admin panel and from the main navigation bar go to the “Applications” sub-section and select “Applications” below that (Direct link: https://<youroktadomain>.okta.com/admin/apps/active)
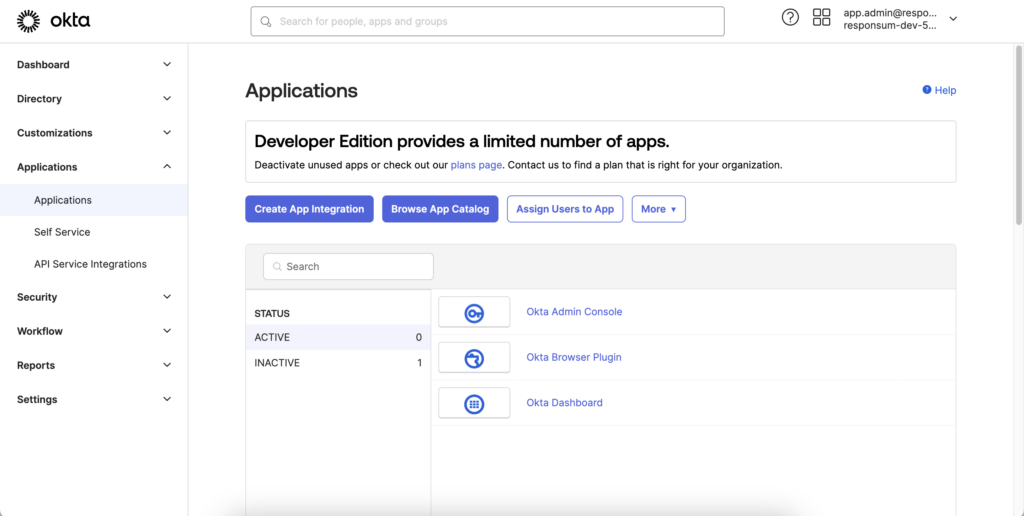
- Select “Create App integration”
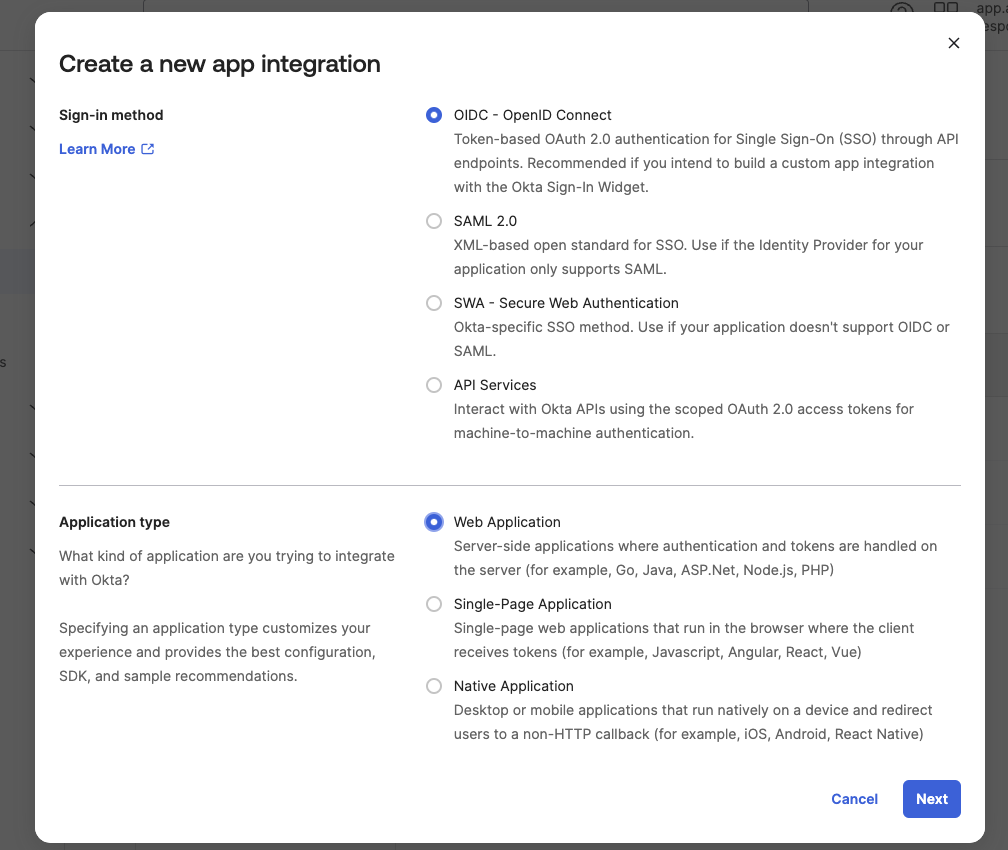
- A pop-up will appear that allows you to select a “sign-in method” and “Application type”
- Sign-in type should be “OIDC – OpenID Connect”
- Application type should be “Web Application”
- A new page will open requesting more details related to the application:
- App integration name: Can be a distinctive name for this integration between Okta and RESPONSUM, like ex. “RESPONSUM SSO Login”
- Logo: Optional so can be left blank
- Grant type: the default values selected can be kept here
- Sign-in redirect URIs: Leave this empty for now and paste the value received back from RESPONSUM as a result of Step 3.
- Sign-out redirect URIs: Sign-out response to Okta can be provided by taking the sign-in redirect URL from above and appending “/logout_response” to the end of that URL.
- Base URIs: Optional so can be left blank
- Controlled access: Depending on if you want to provide the ability to login to RESPONSUM to the entire Okta Organization or a selected group. The option chosen here depends on your specific use case.
- Finish off by pressing “Save”
- Take note of the Client ID and Client Secret shown to later use in Step 3
Step 2: Find your Okta environment Authorization server details (Oauth 2)
- 2 approaches to find the authorization server details can be found below. Depending on the subscription you have with Okta only the first method might be available to you:
Step 2A: Construct the URL yourself based on your environment details
- Okta describes in this guide how to determine the Oauth and OpenID authorization server URL’s. Use the Oauth instruction in this case.
- In summary, the URL should have the following structure:
- https://<yourOktaOrg>/.well-known/oauth-authorization-server
- Example: https://responsum.okta.com/.well-known/oauth-authorization-server
Step 2B: Use the API access management portal (If part of your subscription and/or multiple authorization servers are defined)
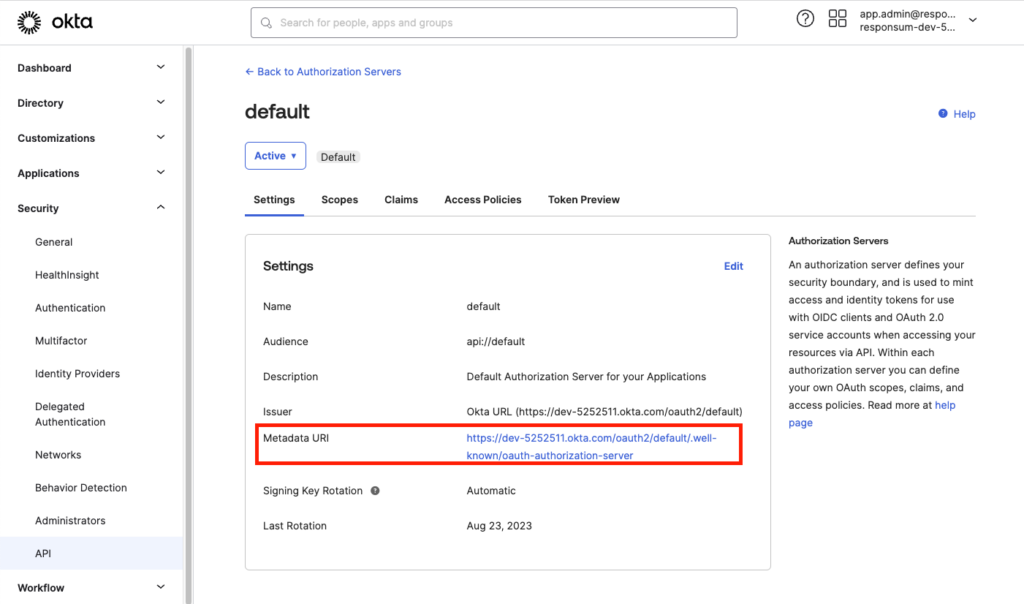
- In the Okta admin portal, navigate via the side menu to Security >> API >> Authorization servers tab. Here you will find that you have a “Default” authorization server normally.

- Click through on the “Default” name in the overview to get to the details page.
- Copy the “Metadata URI” value for later use in Step 3
Step 3: Bundle the information and provide it to RESPONSUM
With the information of step 1 and 2 combined, Copy the following details in 3 separate emails to support@responsum.eu:
- Client ID
- Client Secret
- Authorization URL
When we setup your integration based on the details above, we will provide you the correct redirect URL’s and Logout URL’s to be added to the app in Okta to make it fully operational.
If you want additional security for the transfer of these credentials, send us an email upfront via support@responsum.eu, and we will provide a secure upload zone where you can upload the credentials and provide them to us directly.
We will now go ahead and setup the integration for SSO for your specific environment. We will get back to you in a reply on one of the emails when the integration will be activated and available. After this communication, run a thorough test to see if all works as intended.
Enjoy using Okta for login to RESPONSUM!