In some cases you want a custom Microsoft SSO login flow for users within your organization as the out of the box Microsoft login of RESPONSUM is not entirely what you are looking for.
This guide will show you the steps to create a Microsoft Azure Active Directory application in order to allow login from RESPONSUM to your specific Microsoft AD tenant.
Step 1: Request that you want to activate a specific Microsoft SSO integration
Send us an email via support@responsum.eu with a brief description that you want to create a specific Microsoft SSO login flow for your RESPONSUM environment. As a reply back from us, you will receive a Redirect URL that you will need to conduct the next steps.
The URL you will receive will look something like: https://id.responsum.app/realms/<companyname>/broker/microsoft/endpoint
Step 2: Register the app in Azure AD
Create a new Active Directory Application via the “App registration” portion of the Azure AD portal: https://portal.azure.com/#blade/Microsoft_AAD_IAM/ActiveDirectoryMenuBlade/RegisteredApps
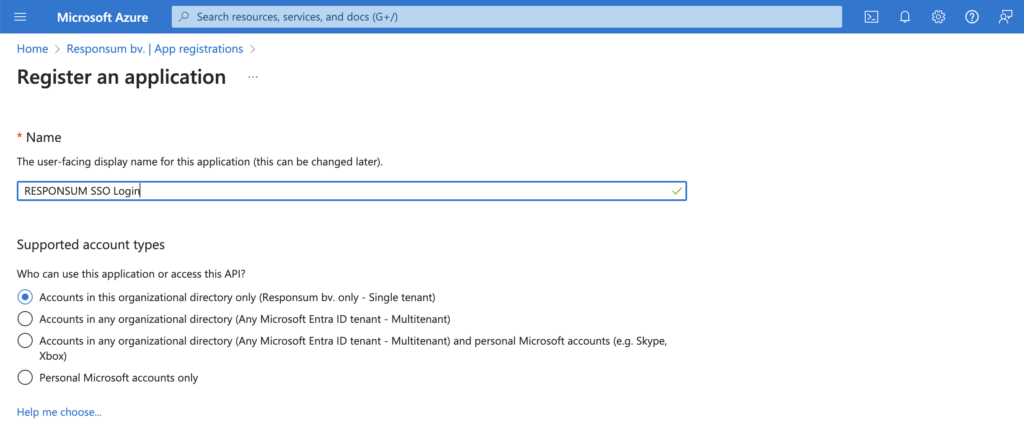
This application can be named however you like (e.g. “RESPONSUM SSO Login”):
- Select the “Accounts in this organizational directory only” option for the “Supported account types”.
- As redirect URI, you can indicate “Web” and add the URL you got back from support@responsum.eu as part of step 1.
- Press “Register” to create the application


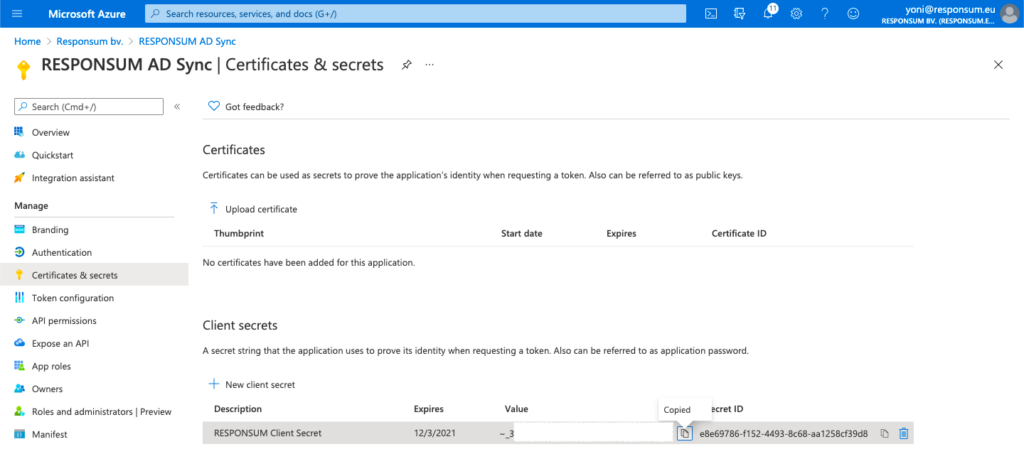
Step 3: Create a client secret for the app
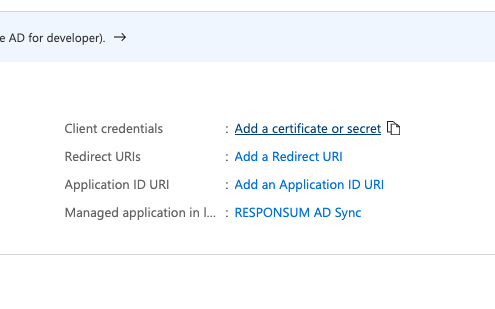
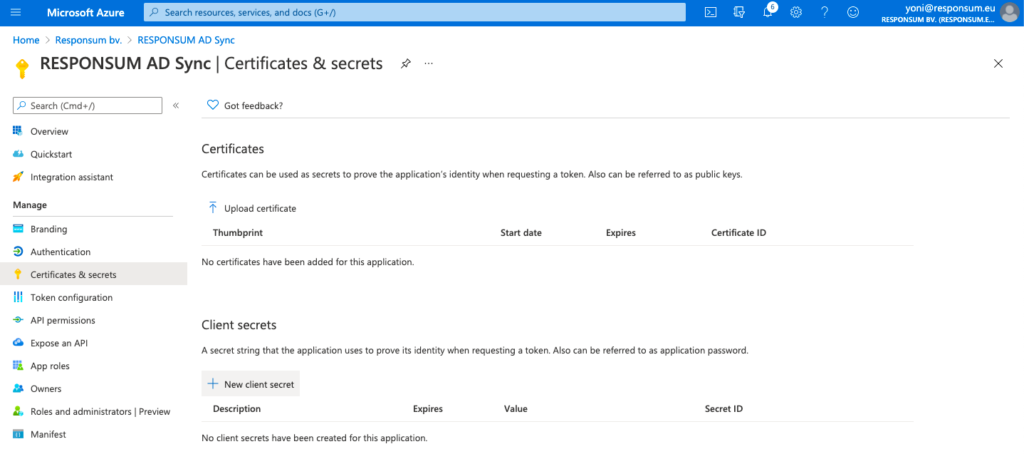
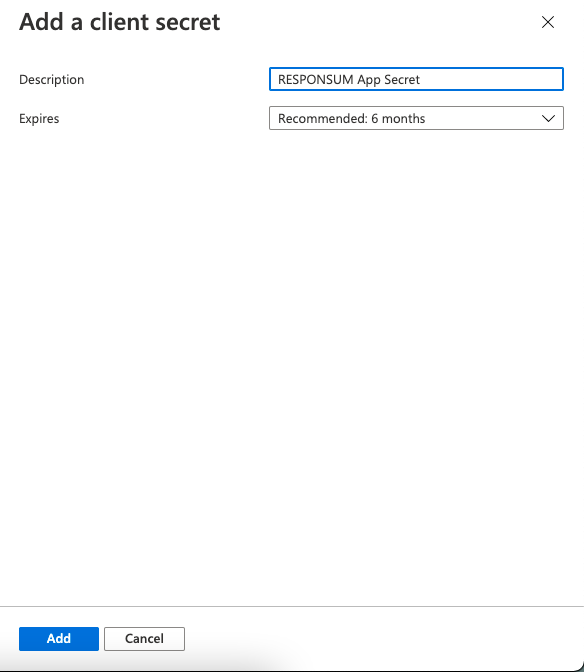
Next thing to be created is a Client Secret that RESPONSUM can use to access the API and get user info for the SSO login. This can be done from the overview page of the earlier created app by clicking “Add a certificate or secret”. On the newly opened “Certificates & Secrets” page, select “New Client Secret” to create the new secret. Give the secret a description (e.g. “RESPONSUM App secret”) and keep the default expiration date or choose your own.
NOTE: Keep in mind to renew this secret based on the expiration date you set for the SSO login to stay operational
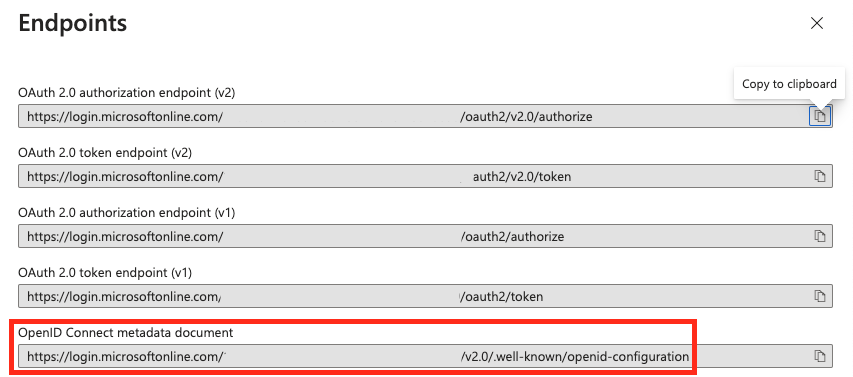
Step 4: Get the Discovery endpoint URL for OpenID connect
When on the overview page of your app registrations in Azure AD, click the “Endpoints” button to show all endpoints and their URL related to your AD organization.
From the sidepanel that opens, select the “OpenID Connect metadata document” and copy it for step 5.

Step 5: Get all information and bundle it to provide to RESPONSUM Support
In addition to the secret “Value” created in step 3, three other parameters should be collected before sending them over to RESPONSUM. These three parameters can be found on the main “Overview” page of the Azure application:
- Application (Client) ID
- Object ID
- Directory (Tenant) ID
- OpenID Connect metadata document URL (Step 4)
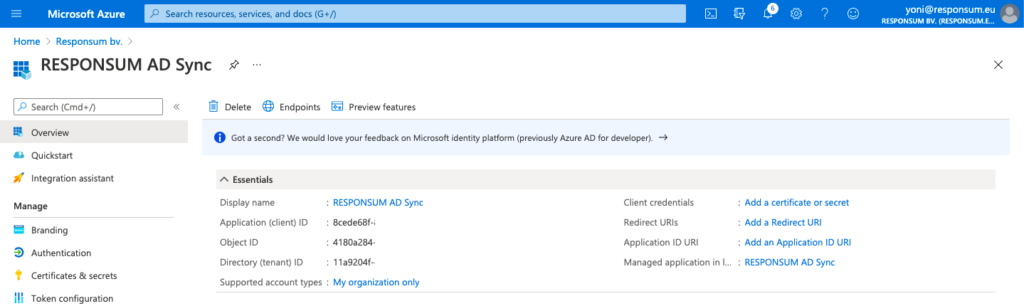
With this additional information together with the Secret “Value” (Step 3), you are ready to provide the information to RESPONSUM support.
We recommend to provide the above details in separate emails to support@responsum.eu. If you want additional security for the transfer of these credentials, send us an email upfront via support@responsum.eu, and we will provide a secure upload zone where you can upload the credentials and provide them to us directly.
Based on these provided details, we will go ahead and setup the integration for SSO for your specific environment. We will get back to you in a reply on one of the emails when the integration will be activated and available. After this communication, run a thorough test to see if all works as intended.
Enjoy using your specific Microsoft SSO flow for login to RESPONSUM!