This guide will help you setup an application in Microsoft Azure AD that allows RESPONSUM to get User information from the AD and create Employee/User accounts for those users within RESPONSUM. This sync can be configured and can be done automatically on a set interval or manually from within the AD sync sub-menu.
NOTE: This sync flow only works with Azure AD setups. On-premise Active Directory installations are not supported by RESPONSUM.
NOTE: If no scope is set in RESPONSUM, this integration will try and import all users that are known in your Active Directory, including external accounts that have access through your services and thus are known by your AD. Be careful using this integration as it can import more users then you anticipated, check with your IT administrator beforehand.
STEP 1
Create a new Active Directory Application via the “App registration” portion of the Azure AD portal: https://portal.azure.com/#blade/Microsoft_AAD_IAM/ActiveDirectoryMenuBlade/RegisteredApps
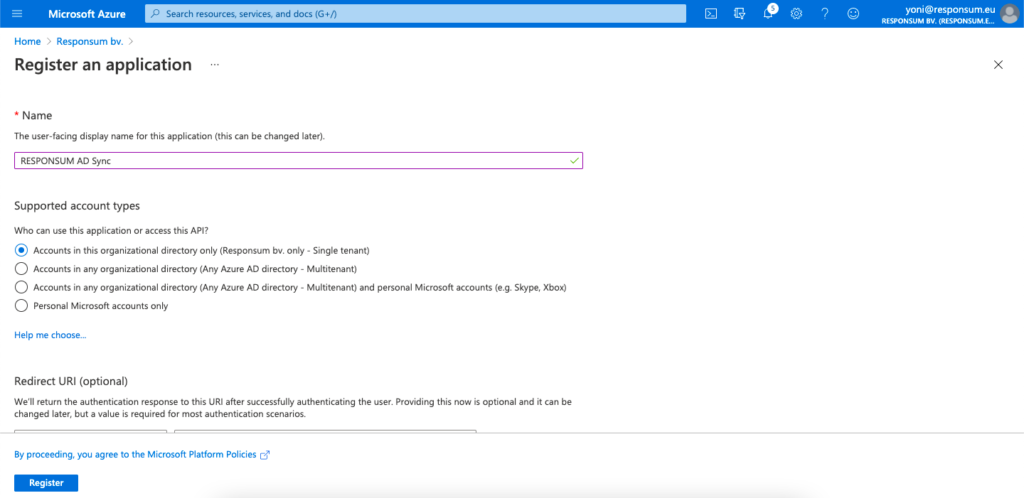
This application can be named however you like (e.g. “RESPONSUM AD Sync”). Select the “Accounts in this organizational directory only” option for the “Supported account types” and “Register” the application.

STEP 2
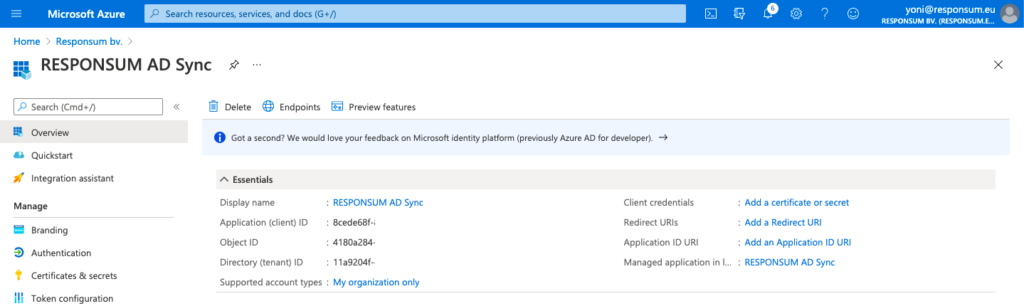
On the overview page of the newly created application, you will see following two parameters:
- Application (Client) ID
- Directory (Tenant) ID
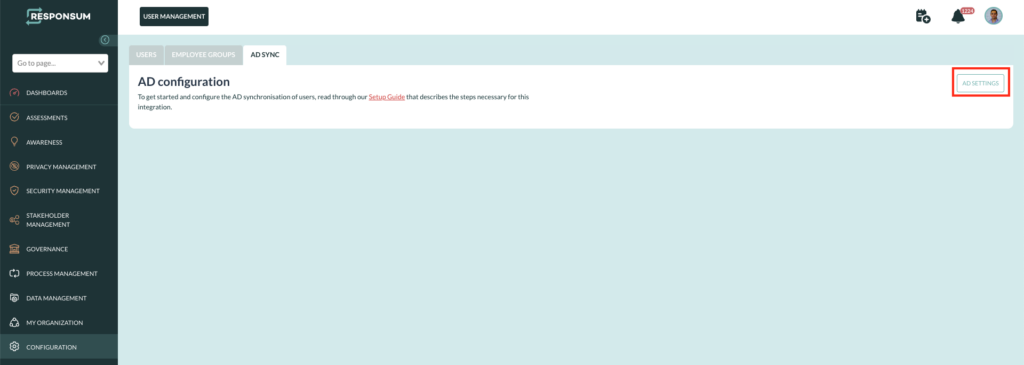
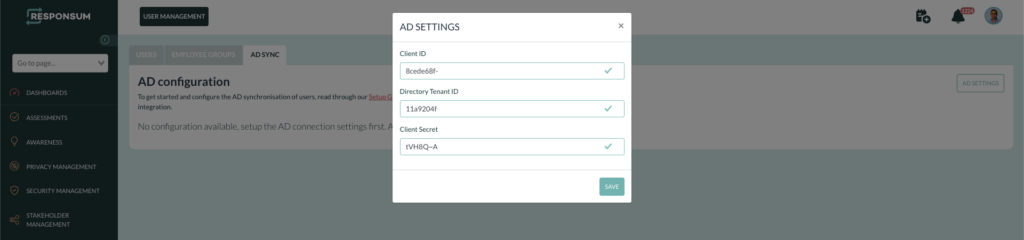
These two parameters can be added to RESPONSUM already under Configuration >> User Management >> AD Sync. Once on this page, press the AD settings button in the top right corner:
Azure Portal:
RESPONSUM App:

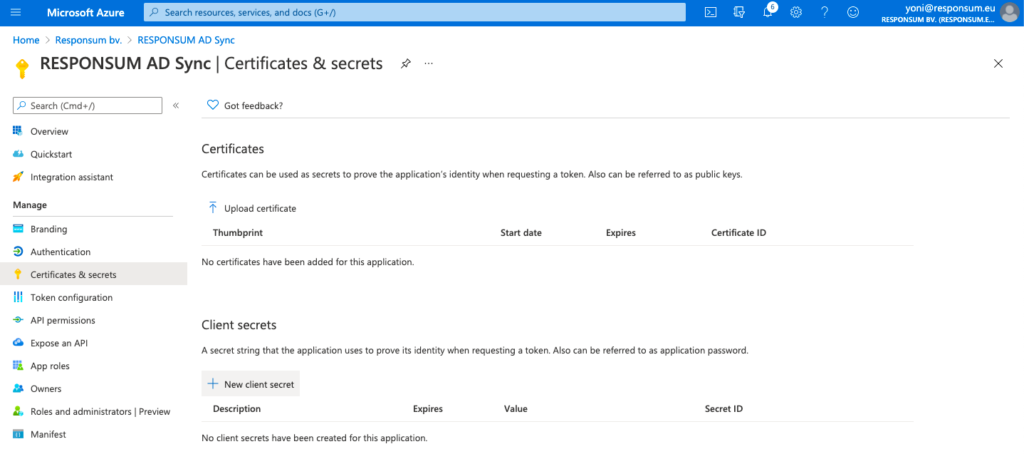
STEP 3
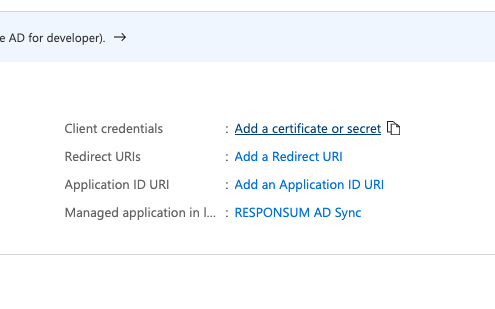
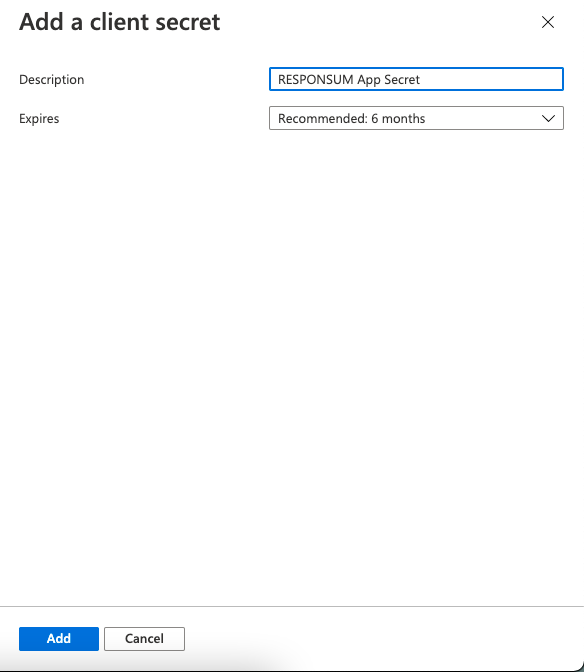
Next thing to be created is a Client Secret that RESPONSUM can use to access the API and get user info. This can be done from the same overview page by clicking “Add a certificate or secret”. On the newly opened “Certificates & Secrets” page, select “New Client Secret” to create the new secret. Give the secret a description (e.g. “RESPONSUM App secret”) and keep the default expiration date or choose your own.
NOTE: Keep in mind to renew this secret based on the expiration date you set for the sync to stay operational
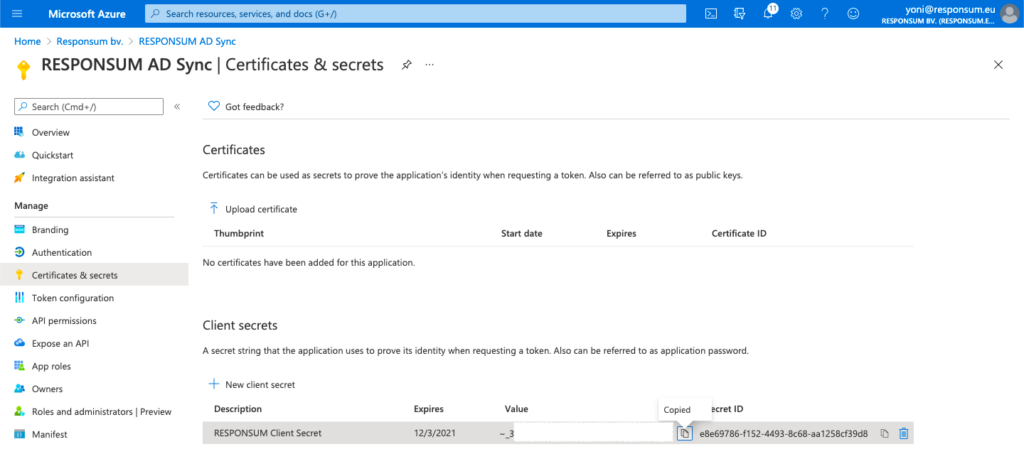
STEP 4
When the client secret is created, copy it over to RESPONSUM but do NOT save the details just yet.
NOTE: The client secret is only shown once in the Microsoft Azure portal, if you lose it, the client secret can be deleted and step 4 repeated to create a new one.
STEP 5
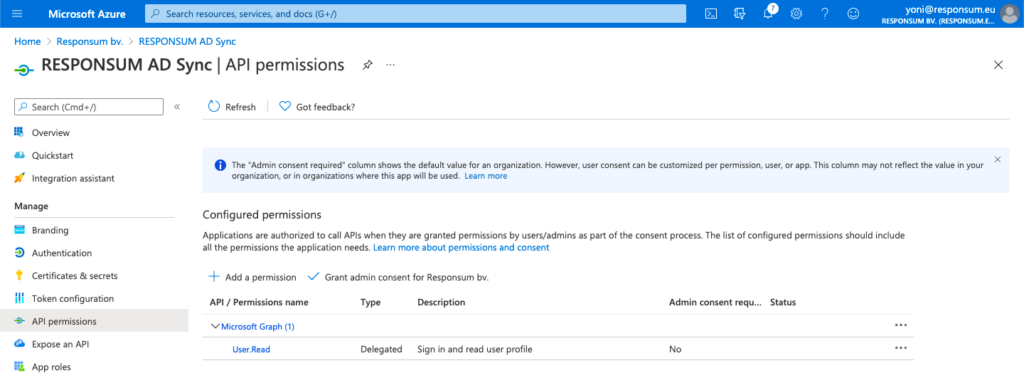
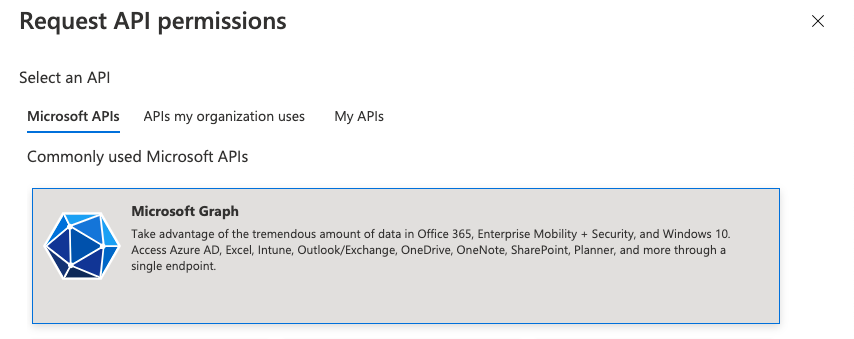
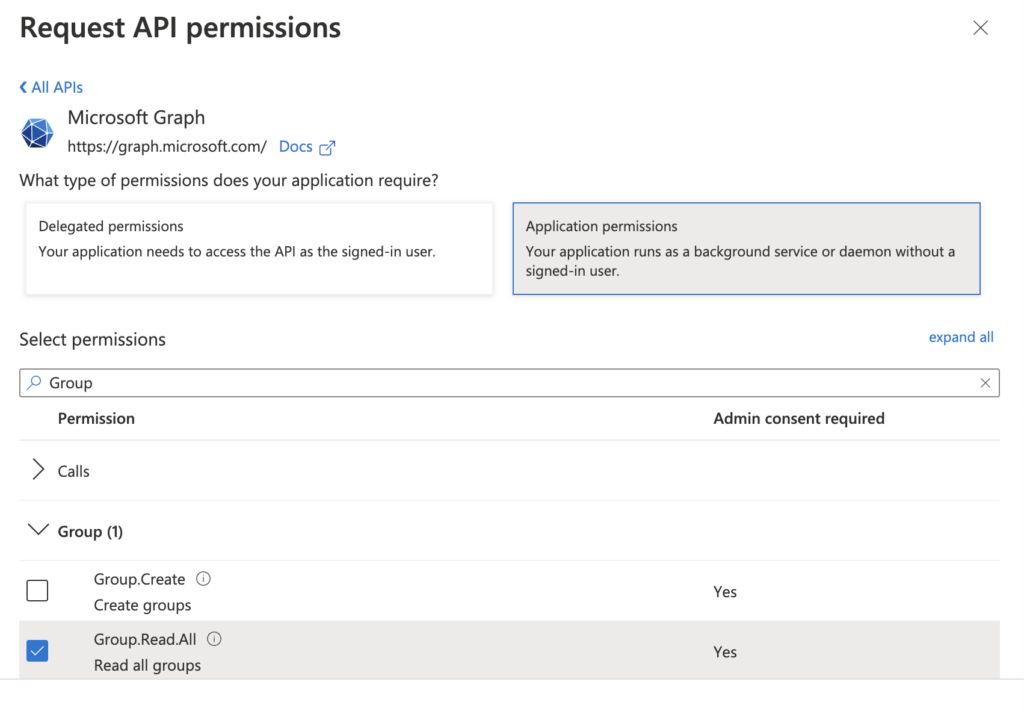
Next step is to give RESPONSUM the correct permissions to use the API to get User information from your AD. This can be done in the API Permissions sub-section of your created application. By default, the Microsoft Graph API, “User.Read” permission will be present.
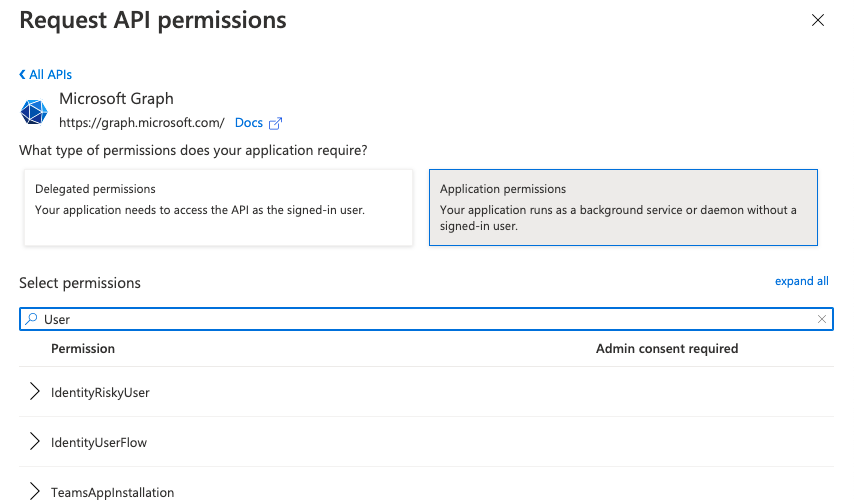
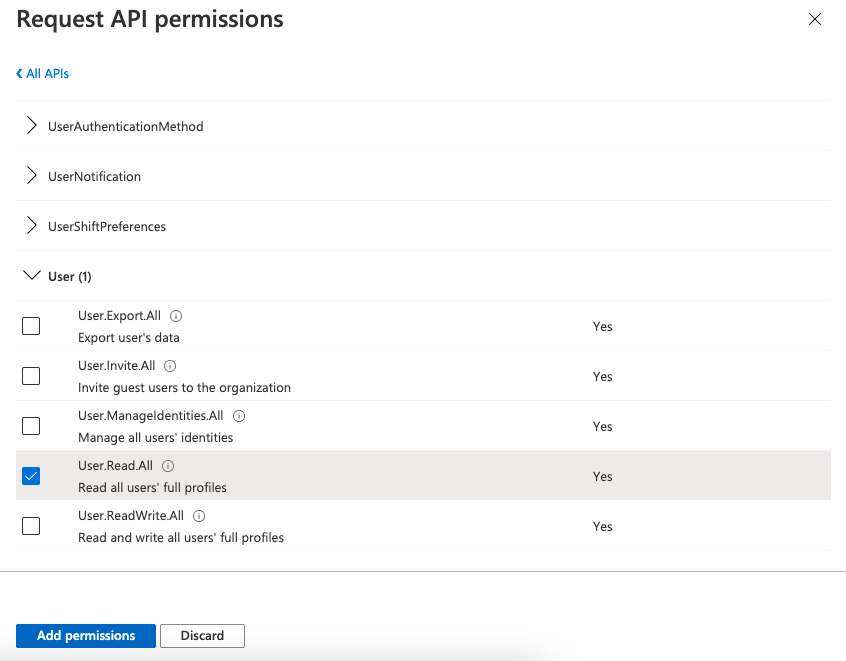
This permission should be extended with the “User.Read.All” and “Group.Read.All” permissions. These can be added by pressing “Add a permission” followed by “Microsoft Graph” >> “Application permissions”. Then you can search for “User” and afterwards “Group” to find the user and group specific permissions:
STEP 6
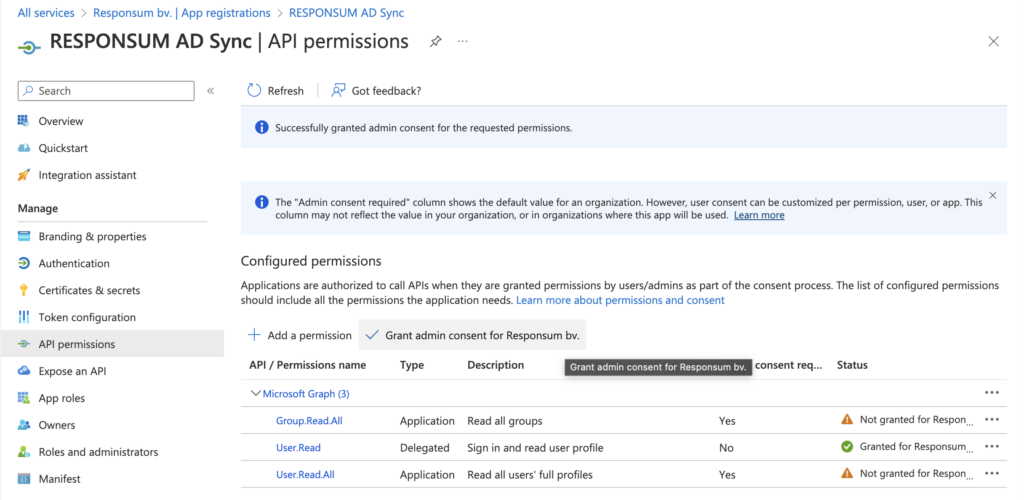
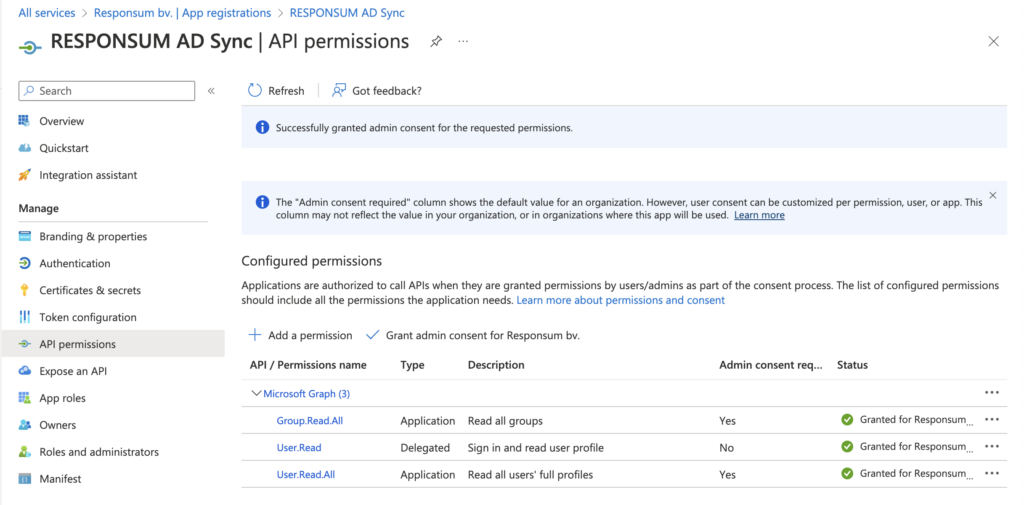
Once the permissions are set, you need to Grant admin consent for your organization for us to be able to use the new permissions. This can be done by pressing “Grant Admin consent for <Organization name>”:
NOTE: Make sure that you use an account with sufficient permissions to be able to grant this access.

STEP 7
Once the permissions are set, navigate back to RESPONSUM and save the prior filled out details. After saving, you should be redirected to a page similar to this:
NOTE: If the credentials do not want to save right away, wait a moment and try again. It can take some time for your AD environment to provision the changes.
That should be all for the technical configuration part 🙂
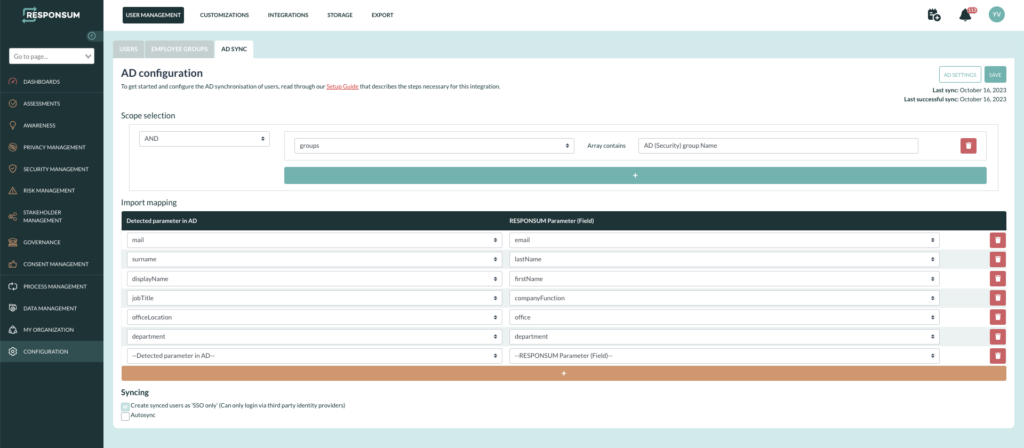
The next steps will be to select what specific users (Scope) you want to sync with RESPONSUM based on settable parameters. This allows you to fine-tune who is imported and who is not.
NOTE: Please use ARRAYCONTAINS option when you want to put in scope one or more AD security groups.
An import mapping can be made to map the corresponding AD field of the user to a user field in RESPONSUM.
You will also be able to let this sync run automatically or trigger a manual sync from this overview page.