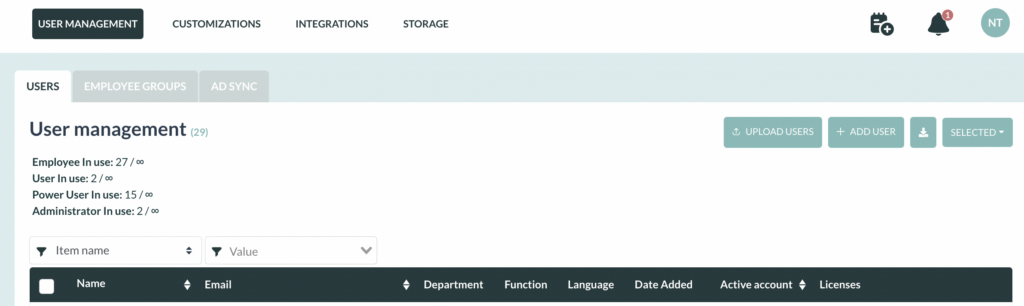
User Management
- Click Configuration > Users Management.
- In the user management view, you will get an overview of the package included (Employees/Users/Power Users/Administrators) licenses used and non-assigned.
- When you have non-assigned licenses available, you can upload users.
- Creating a new user account can happen in two ways: adding an individual user or adding multiple users at once.
Adding an individual user
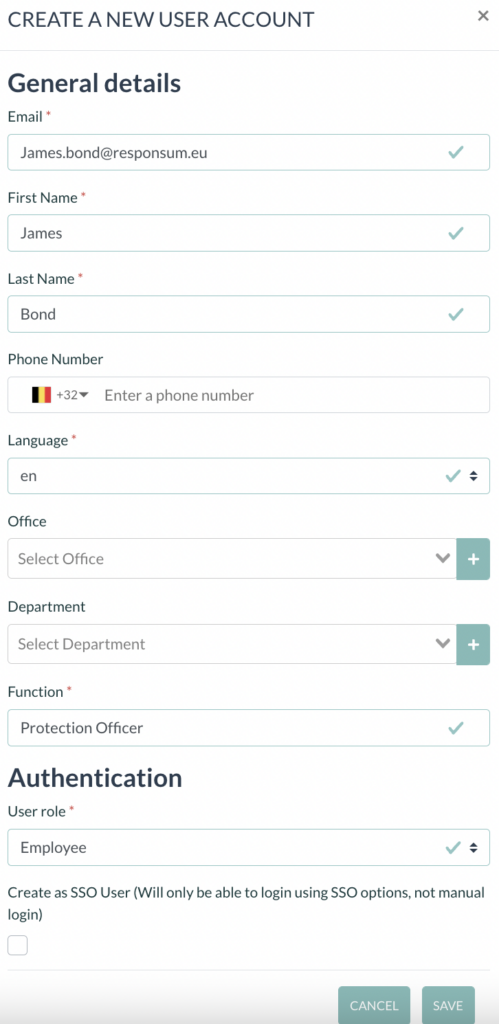
- Click ‘Add user’
- Fill out all the mandatory fields:
- First name
- Last name
- Language
- Function
- Select a user role, more information about the roles are mentioned below.
- Click ‘save’.
The user will be listed in the user overview and receive an invite to set-up their account.
Adding multiple users
- Click ‘Upload Users’
- Click ‘Download template’
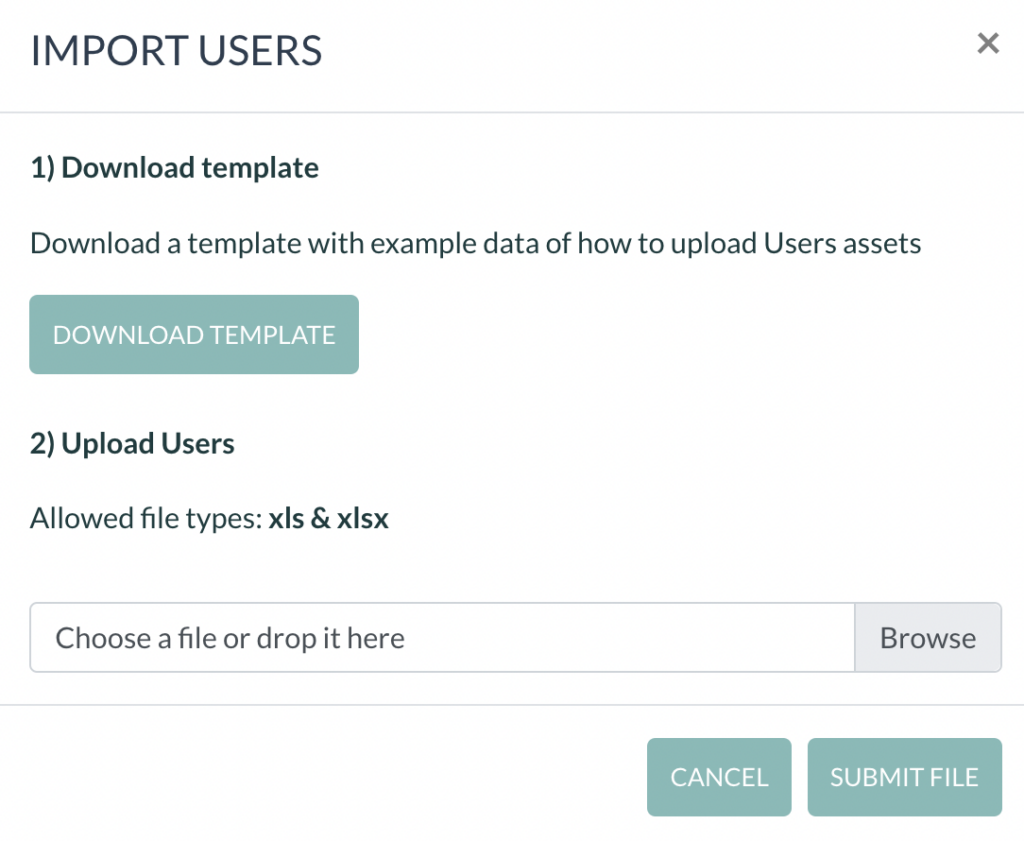
- Download the template with example data of how to upload new users.
- Open the template.
- Fill out all the mandatory fields:
- Username
- First name
- Last name
- Select a user role, more information about the roles are mentioned below.
- Save the file as a xls, xlsx or csv filetype.
- Upload the file by dropping it in the upload field or by browsing your computer.
- Click ‘Submit file’
- The users will be listed in the user overview and receive an invite to set-up their account.
Managing User Role(s)

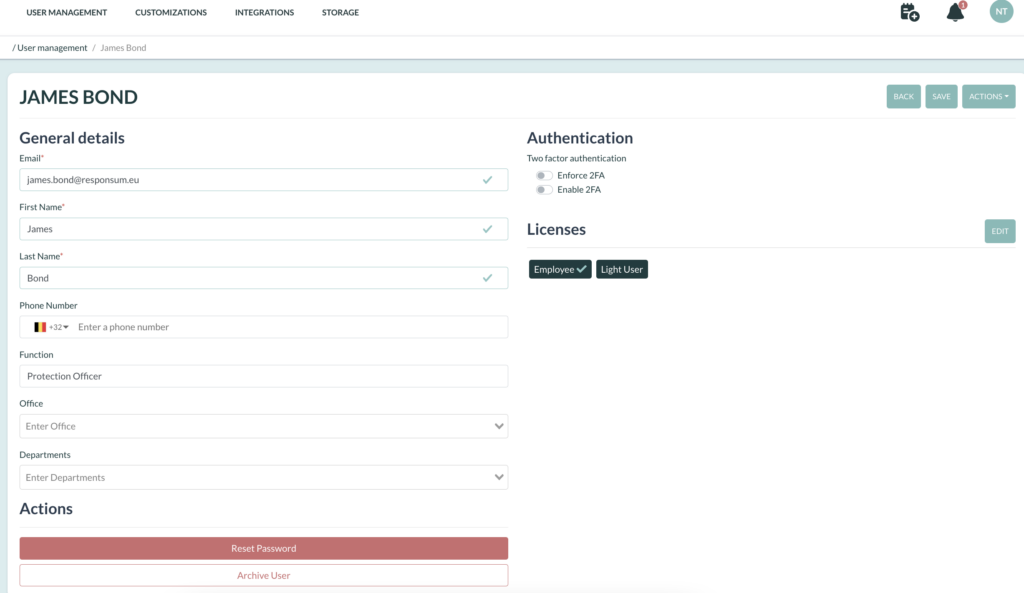
- Click on a user in the user overview. In this case: click on the name “James Bond”.
- Click on the ‘edit’ button next to ‘Licenses’.
- Click on the cross (X) next to the roles that already exist if you want to delete one. Click ‘Add user role’ to add a new role.
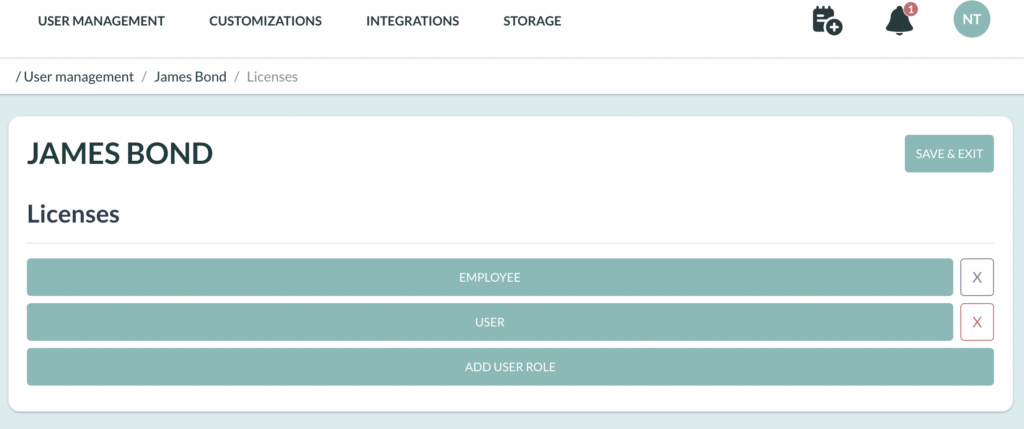
- Select the applicable role, RESPONSUM has the following roles available:
- Administrator: User who can manage RESPONSUM parameters and access.
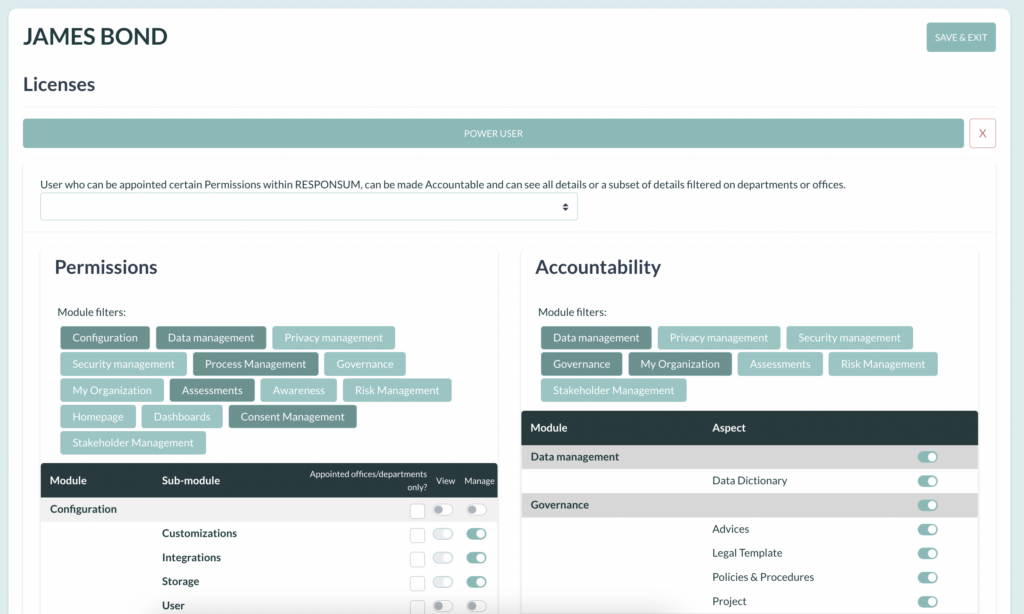
- Power User: User who can be appointed certain Permissions within RESPONSUM, can be made Accountable and can see all details or a subset of details filtered on departments or offices.
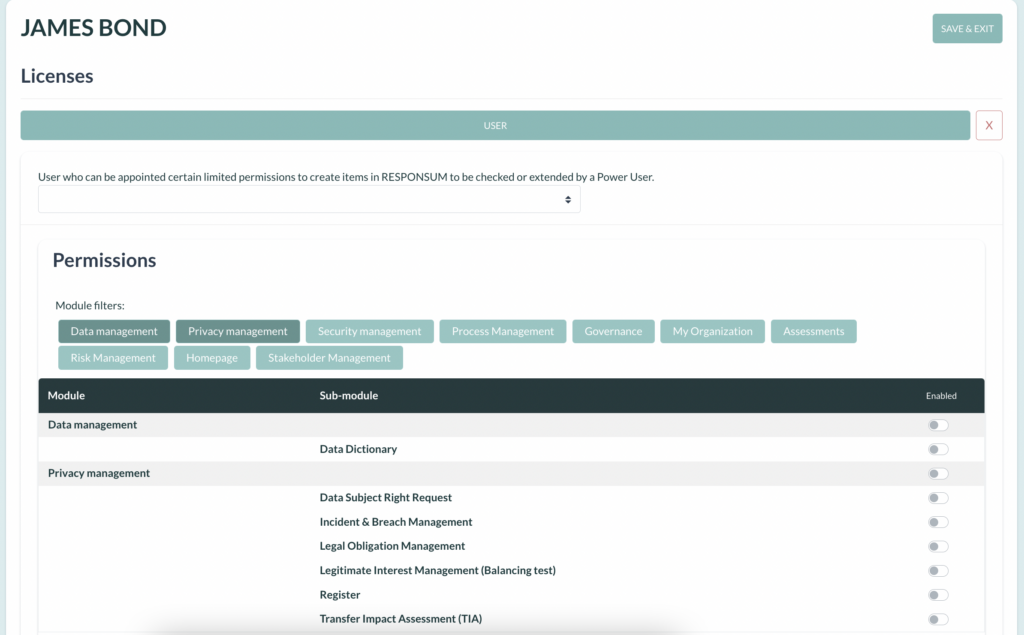
- User: User who can be appointed certain limited permissions to create items in RESPONSUM to be checked or extended by a Power User.
- Employee: User who has Employee Portal access. An employee gets limited access to RESPONSUM for following E-learnings, being part of a phishing campaign etc.
In the picture below, you can see we want to add the user role “USER”. You can give this user specific access rights to specific modules. Once you added a module, you can choose which subjects within that module are accessible by this user by enabling/disabling certain subjects.
When adding a Power User, you can even choose which module can be managed by that user and which only viewed. You can make them accountable for certain modules as well.
4. Click ‘Save and exit’ (top right) to go back to the user configuration screen.
7. Click ‘Save’ if you are done editing the roles.
Reset a User Password
- Click ‘Reset User Password’ on the bottom of the page.
- The user will receive an email with a new password and will be asked to reset the temporary password.
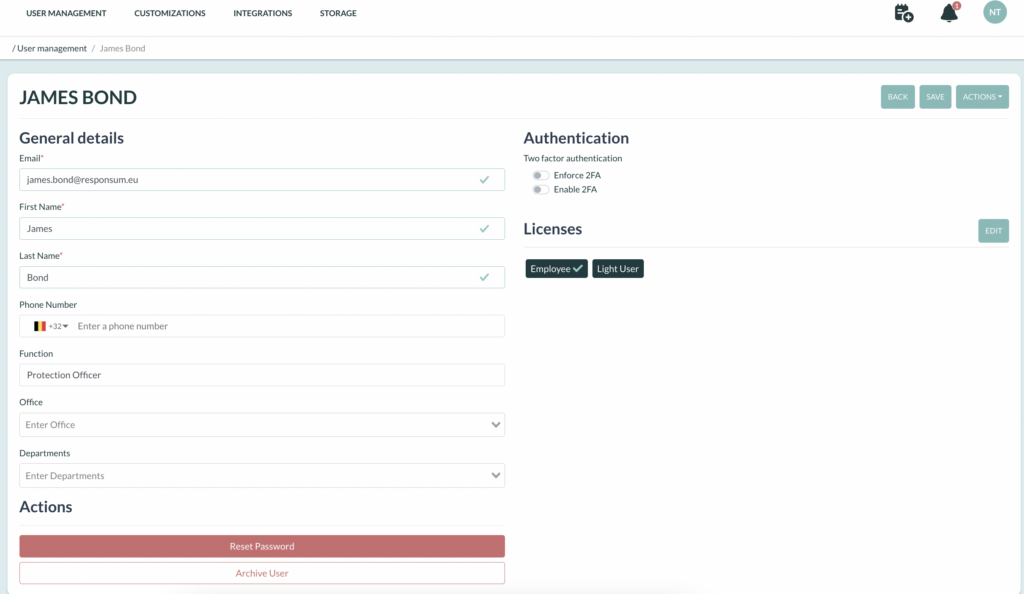
Archive a User
- Click ‘Archive User’ on the bottom of the page.
- Archiving the user will deactivate his account making it unable for him to access Responsum. The license linked to the user will be released. The personal data of the user will be deleted, however usage logs will stay available.
- To confirm press the “Archive User” button.