IMPORTANT NOTE: Since 1/12/22, our phishing IP changed from 195.81.120.238 to 5.22.210.124
INTRODUCTION
This guide will cover how to whitelist phishing campaigns sent by the RESPONSUM phishing email server in your Google Workspace environment.
After following the steps in this guide, your employees working via Gmail for mail traffic will receive our simulated phishing emails.
The following steps need to be taken:
- Add our phishing server IP to your Google (Google Workspace) admin portal
- Whitelist our phishing server IP with any other Email processing applications (if applicable)
Once the settings have been applied on your environment, it can take some time for the changes to take effect. Send an email to support@responsum.eu once the whitelisting was executed. We will send out a test email to see if the settings are set correctly.
To keep in mind:
- We use our ispmail.link domain for DKIM email signing. So emails will originate from this domain and our IP: 5.22.210.124
- Google often releases new changes that might impact email delivery to the end-user. If emails are being quarantined/sent to spam (to be checked in the email logs), feel free to contact us via support@responsum.eu. This way we can assist in fine-tuning the setup.
- If a “Spoofed” email address (Any email address that you or RESPONSUM does not own, ex. google.com) is used in a scenario as From address, Google will append a “Via:” textnext to the FROM address to notify the user that it was sent from another location:

- To prevent this, you can use the DKIM signing domain (ispmail.link) in your From address in the Scenario. You can append as many sub-domain entries to the main domain as needed to make it look as if it originated from another location. (Ex. the Convodo Scenario From address above can be changed to noreply@convodo.com.ispmail.link)

- To prevent this, you can use the DKIM signing domain (ispmail.link) in your From address in the Scenario. You can append as many sub-domain entries to the main domain as needed to make it look as if it originated from another location. (Ex. the Convodo Scenario From address above can be changed to noreply@convodo.com.ispmail.link)
ADD OUR IP TO YOUR EXCHANGE “IP ALLOW LIST”
STEP 1:
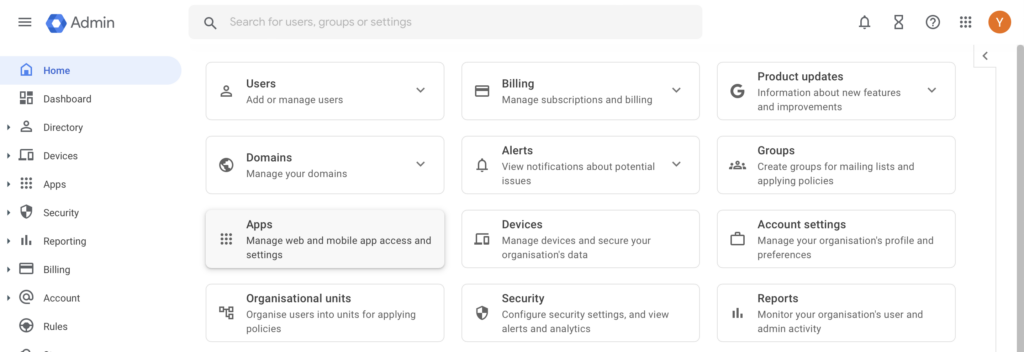
Log into your Google (Google Workspace) admin portal via admin.google.com using an account with administrative privileges (Administrator). Once logged in, select “Apps” from the tiled overview page.
STEP 2:
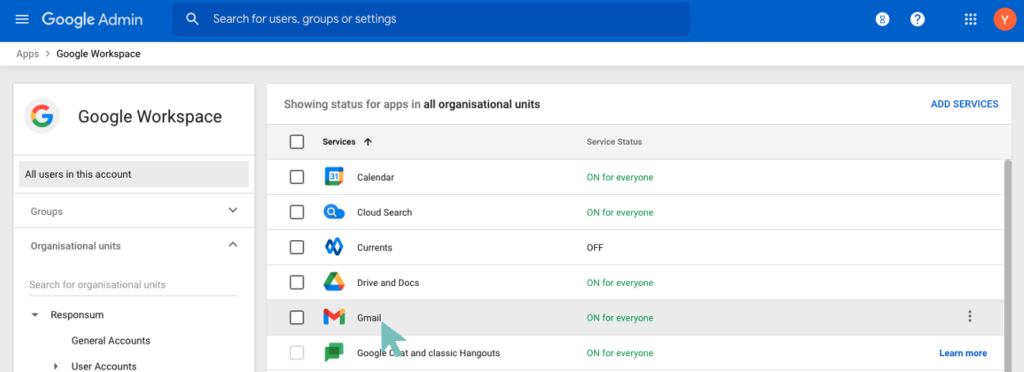
On the next screen shown, select “Google Workspace”

STEP 3:
Select the “Gmail” service from the list of services
STEP4:
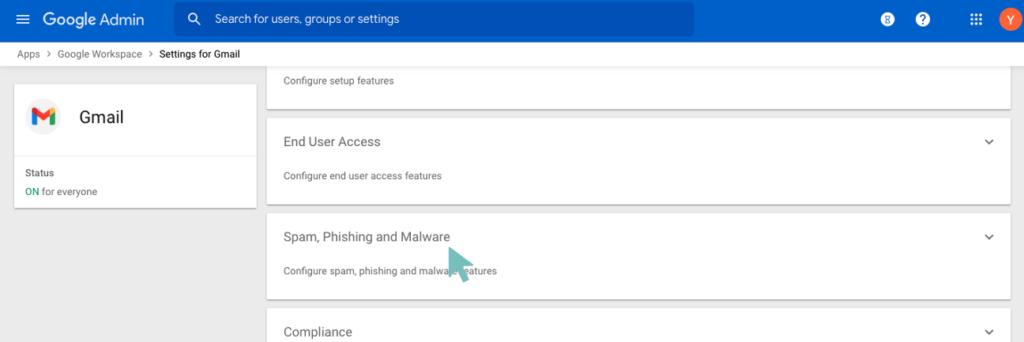
Scroll down to the bottom of the page and select “Spam, Phishing and Malware”
STEP 5:
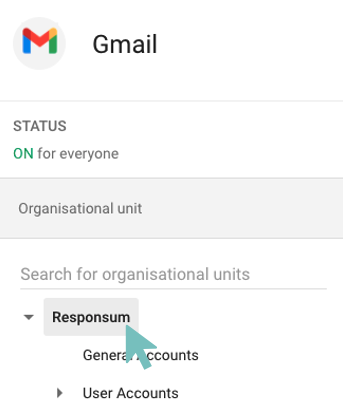
Google uses “Organizational units” or “Organizations” to define different settings for different parts of your company. You have two options here:
- If you want to apply the Whitelisting of our Phishing server IP address over your entire company Gmail, select the top-level organization (in this example RESPONSUM).
- If you want to apply the Whitelisting of our Phishing server IP address only to a certain “organizational Unit” or “Organization” within your company, select this specific “organizational unit” or “Organization”
STEP 6:
Once decided on which “Organizational Unit” to apply the setting, search for the Email whitelist setting. Add in this setting the following IP address of our phishing server: 5.22.210.124
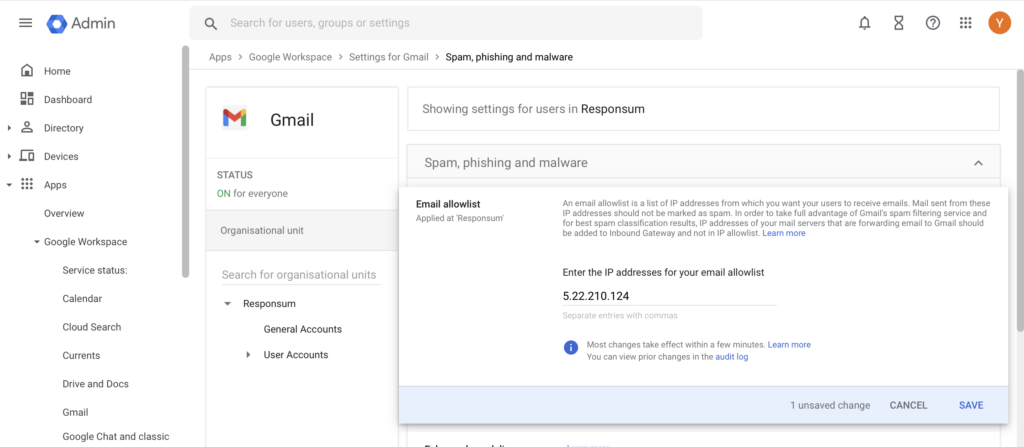
STEP 7:
Press “Save changes” at the bottom of the page to confirm the change made. For this change to take effect, it can take up to one hour.
3 OTHER SERVICES PROCESSING EMAIL
If you have any other services that process the email before they are received by Google mail servers (External Spam Filter…), make sure to also whitelist our IP (5.22.210.124) and DKIM signing domain (ispmail.link) with these services as they could still block our emails.