The RESPONSUM SMS Phishing Module enables you to simulate a real-world SMS phishing attack. It provides you all the tools you need to create a custom campaign in an easy and intuitive way in only 6 steps:
Navigate
- Go > Awareness > Phishing.
- Click ‘Create new campaign’ as indicated by the orange arrow on the picture below.

Step 1
- Click ‘SMS Phishing’

Step 2
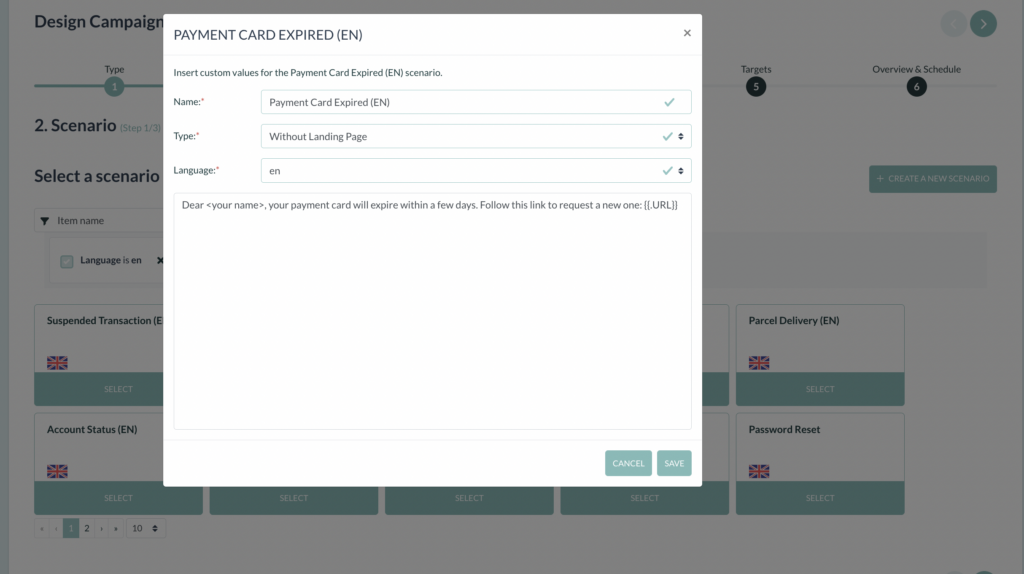
- Create an SMS scenario:
- Click on ‘Create new scenario’ or hover over a template scenario and select the pencil (the middle icon).
- Provide the scenario a name by filling out the ‘Name’ field.
- Choose the type of phishing by selecting it from the ‘Type’ list. “Without landing page” will ensure the employee who clicks will immediately go to the training page. “With landing page” will ensure the employee who clicks will go to a landing page where he/she will be asked to enter data, before going to the training page.
- Select the language from the ‘Language’ list.
- Create the scenario by typing in the text field or by changing the ‘<>Source’ to HTML and editing the code.
- Click ‘Save message’.
- When “with landing page” is selected, the next step is to edit the landing page. When “without landing page” is selected, the next step is to edit the training page.
- When the scenario is selected, click on the arrow in the right upper corner to proceed to the next step.
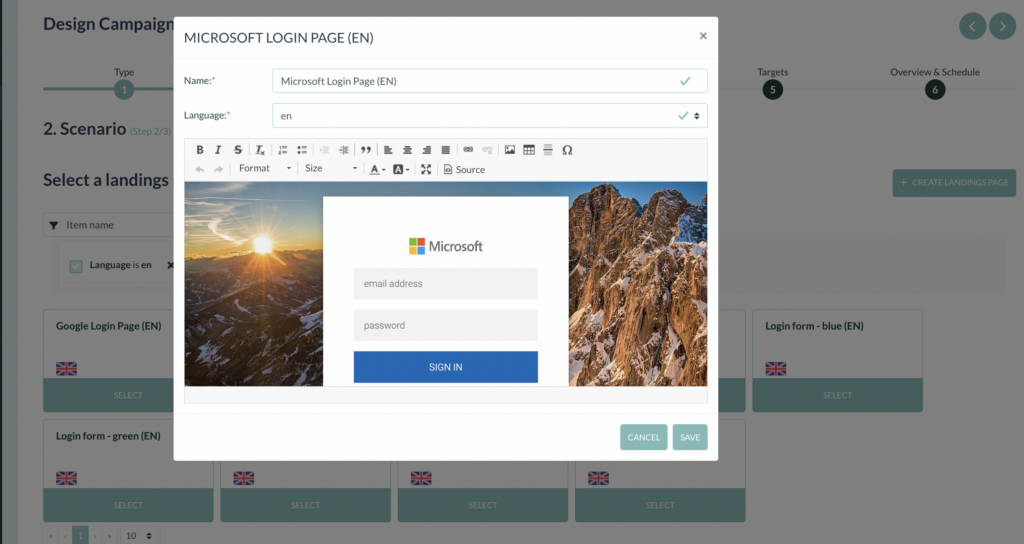
- Create a landing page scenario:
- Click on ‘Create new landing page’ or hover over a template scenario and select the pencil (icon in the middle).
- Provide the scenario a name by filling out the ‘Name’ field.
- Select the language from the ‘Language’ list.
- Create the landing page by typing in the text field or by changing the ‘<>Source’ to HTML and editing the code.
- Click ‘Save message’.
- When the landing page is selected, click on the arrow in the right upper corner to proceed to the next step.
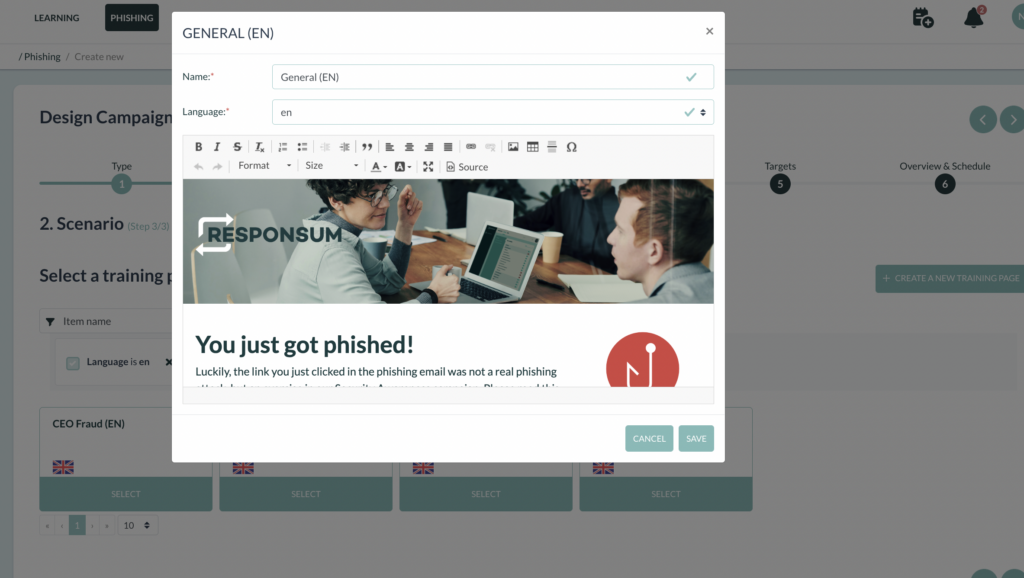
- Create a training page scenario:
- Click on ‘Create new training page’ or hover over a template scenario and select the pencil (icon in the middle).
- Provide the scenario a name by filling out the ‘Name’ field.
- Select the language from the ‘Language’ list.
- Create the landing page by typing in the text field or by changing the ‘<>Source’ to HTML and editing the code.
- Click ‘Save message’.
- When the training page is selected, click on the arrow in the right upper corner to proceed to the next step.
Step 3
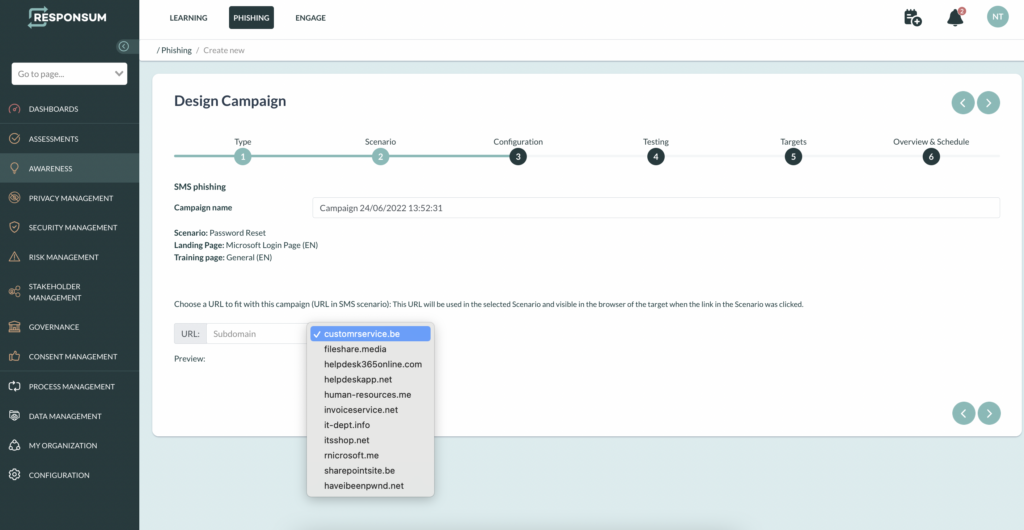
- Name your campaign
- Choose an URL that fits the campaign. Create a subdomain, by filling out the “Subdomain” field. Select a domain from the list.
- Click on the arrow in the right upper corner to proceed to the next step.
Step 4
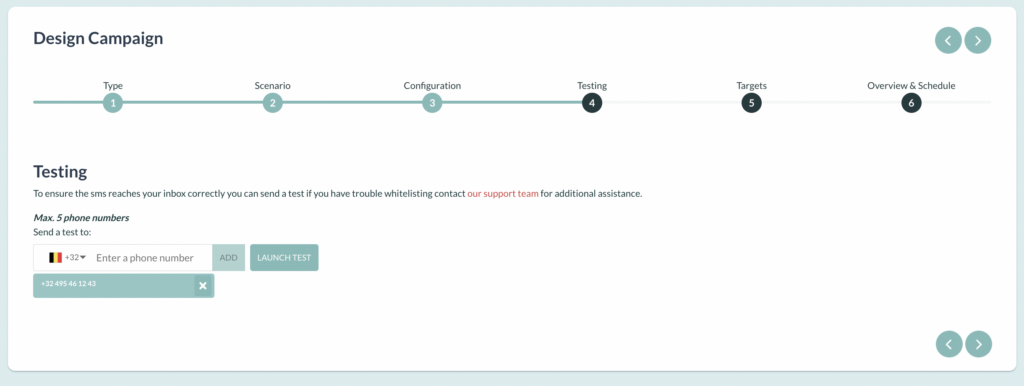
- To ensure the SMS reaches your inbox correctly, provide a test phone number in the test field.
- Click ‘Add’.
- Add up to 5 phone numbers.
- Click ‘Launch test’.
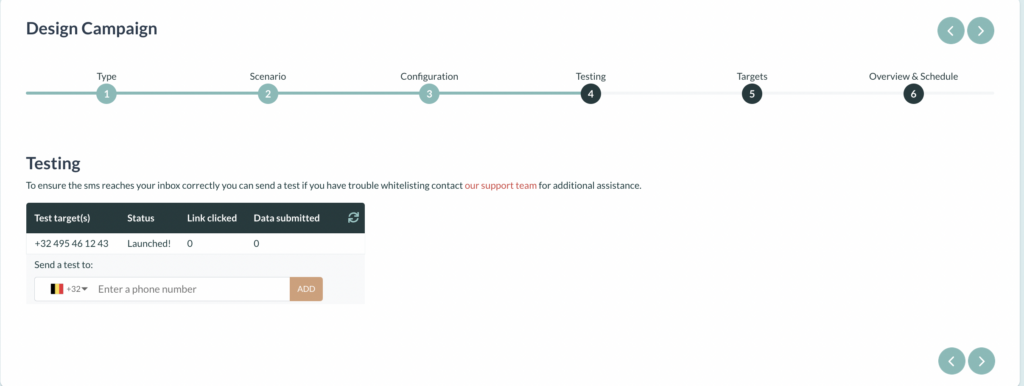
- When the test is ok, you can proceed to the next step by clicking on the arrow in the upper right corner. When you want to run another test, click on the refresh sign. Test until the simulation looks ok.
Step 5
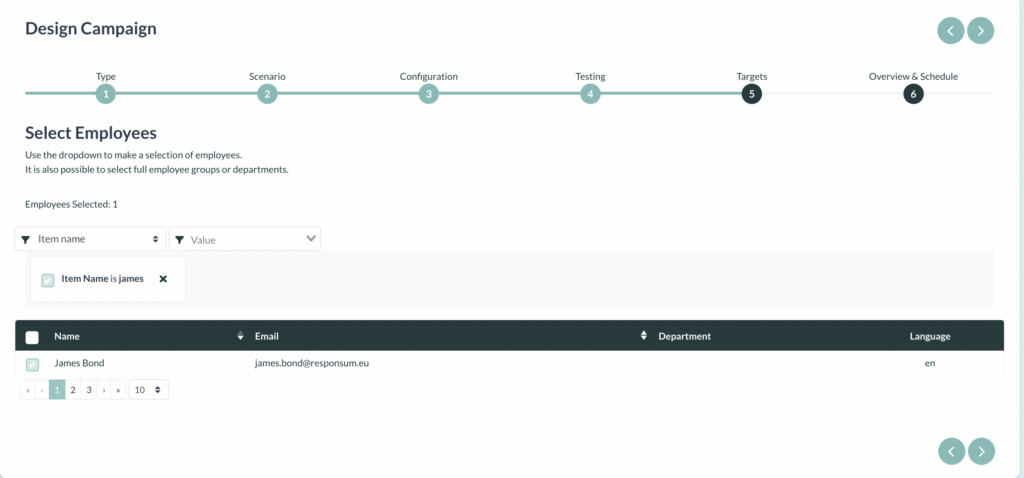
- Choose the target employees, by filtering on group, department or another item.
- Tick the upper checkbox to select all the listed employees or select individual employees by ticking the checkbox next to the employee(s).
- Click on the arrow in the right upper corner to proceed to the next step.
Step 6
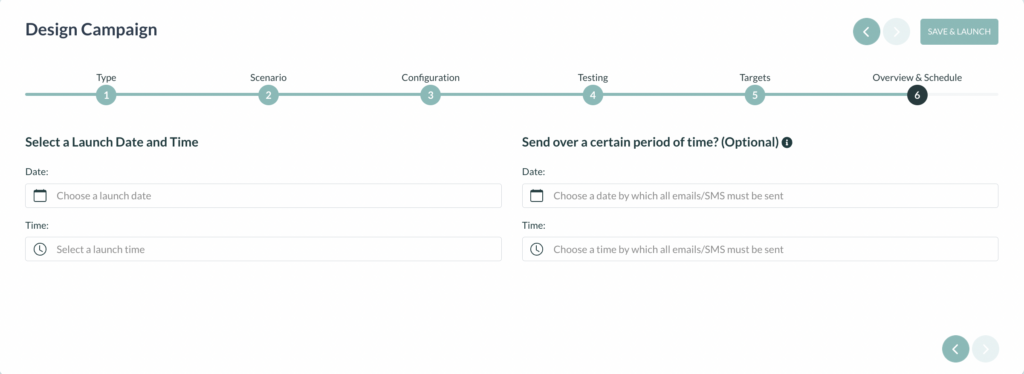
- Select a Launch Date and Time. Click on the agenda sign and select a date. Click on the clock to select a time. Click ‘Select now’.
- Click ‘Save & Launch’.
- You have now launched an SMS phishing simulation! The SMSes will be sent out on the selected date and time. Results will be visible in the dashboard.
